

Did you know that PowerPoint has the function of recording your presentations, and that you can also record them with audio and video?
Recording PowerPoint features is an ideal tool to start recording your online courses, especially if you don't want to spend a lot of time editing video.
In this guide we will explain step by step how to record your video presentations with PowerPoint.
1. Start recording
Once you have all the slides created, it's time to start recording. To do this, go to "Slide Show> Record Slide Show" in the top bar.

Once you have all the slides created, it's time to start recording. To do this, go to "Slide Show> Record Slide Show" in the top bar.

At the top you will find the buttons to start the recording, pause it or stop it.
Just like when making a presentation, you'll find the pointer, pencil, and highlighter tools - all strokes and pointer movements will be preserved in the video export.
If you have written notes on your slides you will find them at the top. They can serve as a voice over script during the recording or as a guide.
In the lower right you will find the icons to activate or deactivate the voice and video recording, while in the upper right you will find the settings to choose the devices. During recording, the video will appear in the lower right, but can be modified later.
The two side arrows are for changing slides. Keep in mind that during recording, between slide transitions, neither voice nor audio will be recorded, so you must wait or the audio will cut off.
2. Editing the recording
Once finished, you can edit the pages and the position of the video.
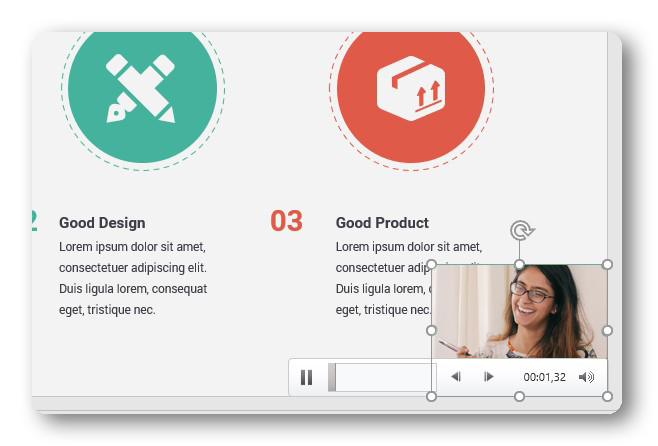
If you click on the image of the video, you can move it and position it where you want. This will only affect the slide you are modifying, so if you want the webcam to be located, for example, in the upper left part of the video, you will have to modify it on each of the slides.
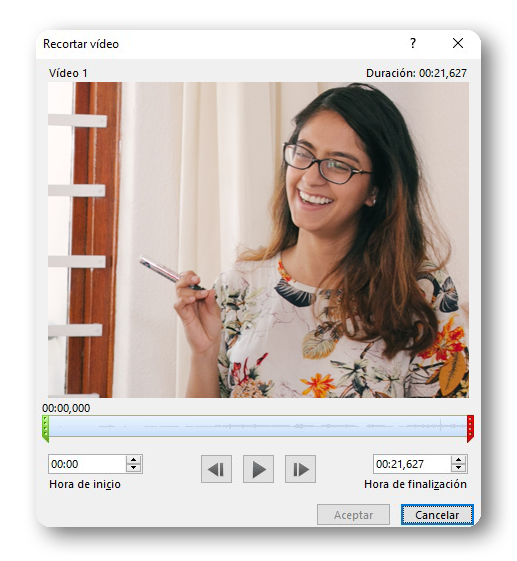
On the other hand, you can also edit the beginning and end of each video, by right-clicking and selecting the "trim" option.
Among other options, you can edit the appearance, such as adding shading or adding margins.
3. Export
To export the presentation in video format you must go to File> Export and select the option "Create a video".
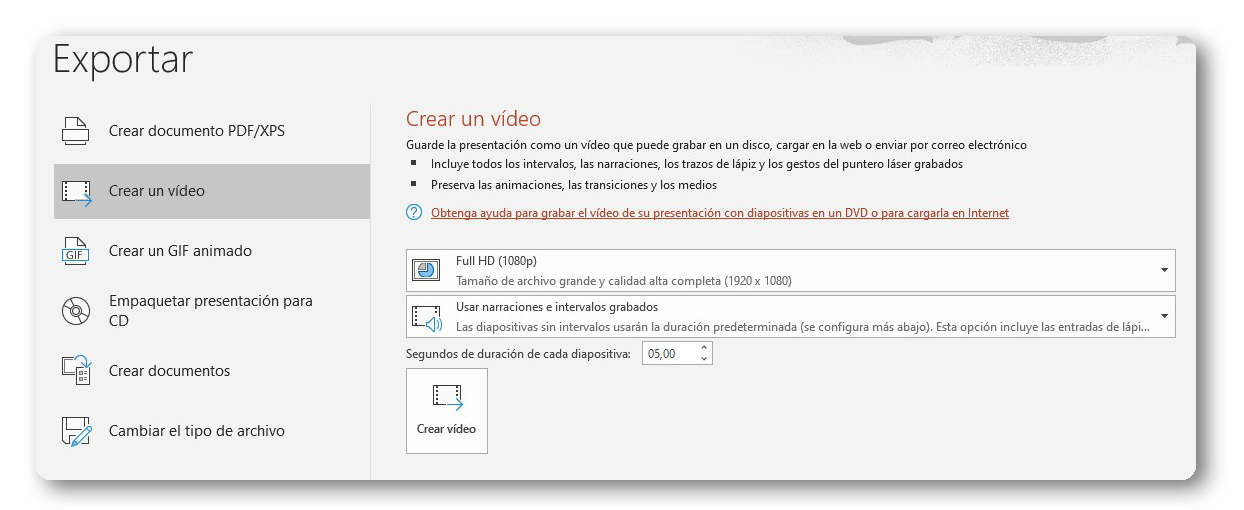
Video includes all timings, narrations, videos, laser pointer strokes and gestures, animations, transitions, and media.
You can choose the video quality, from Standard (480p) to UltraHD (4k). We recommend that to upload it to your training platform you export the video in HD or FullHD.
Select the "Use recorded timings and narrations" option and click "Save video" to finish.
Videos are exported in .mpeg-4.
Finally, you can edit the last details with a video editing program like OpenShot or upload it directly to your training platform.

