
Video editing is one of the least known phases of the entire production process, but without a doubt one of the most important. One of the reasons why people turn to online courses is because of their easy access and the outlined treatment of the subject. Therefore, a good online course must have good video editing.
Some people decide to hire external studios to edit their online courses, but if you are one of those people who like to have total creative control or a tight budget, we want to share with you a series of basic tips to edit your e-learning videos with quality .
1. Preparation
Before starting to edit, it is very important to view and order all the recorded material. Although it may be a tedious task, it is essential to facilitate our editing work.
Discard those video clips that you know you won't use (shame shots) and make a separate folder with good shots. Following your teaching guide and recording rundown, name and number your clips. We even recommend that you divide them by folders according to the module to which they belong. You will see that with this initial effort, video editing will become much more enjoyable.
Another thing to keep in mind before you start editing is to check that all clips have the same video format and resolution. In the beginning, if you have used the same camera to record all the videos, you should not encounter this problem, but if you have used different cameras or have recorded on different days, we always recommend checking the format before recording. If your videos don't have the same format, you'll need to change it to match the clips with the lower resolution. You will lose the quality of the original videos but you will avoid them being pixelated if you do it in reverse (increase the resolution).
2. Editing software
If you have never worked with video editing software, we recommend that you first familiarize yourself with the different functions and tools of the program. Openshot and iMovie are great for beginners, while Davinci Resolve or Adobe Premiere require prior editing knowledge. Keep in mind that the type of computer you have will affect the performance of the program.
Regardless of which software you choose, they all have the same basic tools for editing videos. Let's see them in detail.
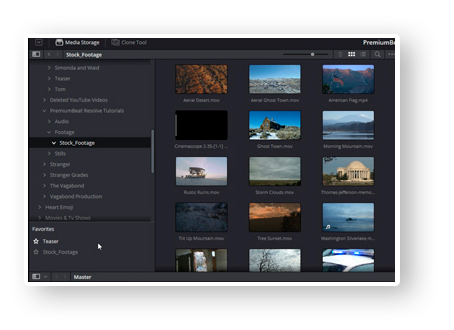
Library Materials
In this window you can export all the material that you will use to edit your videos. If you have done the previous step and have arranged the clips in folders, you can drag them directly to this window.
In some editors we can see the clips and even cut them before adding them to the timeline.
Timeline
The timeline is the space where you can mount your video. You will find two types of track: video and audio.
To start editing your video is as easy as dragging the desired clip from the materials window to the timeline. Once inside, you can move the clip to the minute you want, cut it, duplicate it, add filters and much more.
The timeline works in layers, meaning you can layer multiple video and audio clips on top of each other. This is very useful if you want to work with posters or images superimposed on your videos

Crop Tool

With the trimming tool you will be able to trim and divide video and audio clips.
If a video is linked to an audio, it will also be trimmed, so if you want, for example, to remove a part of the video but keep the audio, you must first unlink the two tracks (by right-clicking the audio clip).
Magnet Tool

The magnet tool is very useful for precision when moving and joining different clips on your timeline. By activating this option, clips are "magnetically" attracted to other elements on the timeline when they are zoomed in at a certain distance. With this option we will avoid that there are unwanted gaps between clips, sometimes imperceptible.
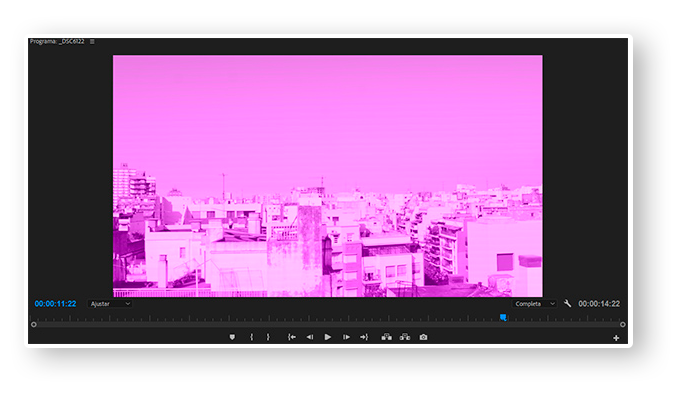
Player / preview
In this window we can view the material from the timeline or from the library material. Like all viewers, it has several playback options (fast-forward, zoom, rewind ...).
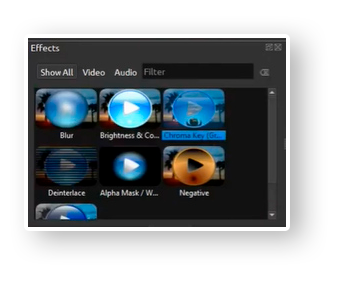
Effects edit (Fx)
All video editing software has a library of effects that offers us the possibility of visually modifying our clips. You can find basic effects such as color balance, zooms or transitions and other more complex and creative effects such as chroma key, masks, pixelation, etc.
3. Edit your project
Now that you are familiar with your video editing program, it is time to edit your e-learning videos.
Editing is not as simple as trimming and adjusting clips on the timeline, you have to keep several aspects in mind that vary from project to project, such as timing, continuity or overlapping images.
Next, we share with you 5 editing tips.
Timing
The timing of the video is very important to keep the student's attention. Obviously, the intonation of the sentences, the change in volume and the speed of the teacher help, but also the editing of the video.We recommend creating capsules of short videos between 5 and 10 minutes, as they best fit the attention span in which the human brain remains focused.
"Arrive late and leave early". Let's avoid “uncomfortable” silences by trying to adjust the cuts of each clip as close to when the teacher starts and finishes speaking to give more dynamism to the video. This does not mean that we should not leave silences so that students can reflect or to separate topics within the same video. In these cases, transitions are very useful, although we must be careful not to abuse them. It is best to use simple and always the same transitions, or our e-learning videos will look like George Lucas's edition of Star Wars.
Raccord / Continuity
The Raccord is the relationship that exists between different planes of a recording, also known as “continuity”. Our goal as editors is to create a continuous narrative line. Maybe it is an obvious concept, but sometimes it is easy to create raccord errors, we see it continuously in the cinema.
For example, in the same video we see three consecutive shots: in the first, the teacher is wearing a jacket, in the second he is not wearing it, and in the third he is wearing it again. Does this error generate a certain rejection? We are distracting the student with redundant changes.
It is important to observe continuity during the editing process, but even more so during filming, especially if it is recorded on different days as it is easier for these raccord failures to arise.
Color correction
Color correction makes different clips maintain the same hue and creates cohesion in the video. Fortunately, the vast majority of editing programs incorporate effects to automatically correct colors. But if the tonal variation is very large between different clips, it will be difficult to fix it. It is for this reason that it is very important to have good lighting and to make white balances in the filming.
Text
Posters are the images and texts that we can add to our videos: Entrance and exit posters, titles, descriptions, listings, images… These posters will help the student to better visualize the teacher’s information.
Most video editing programs have built-in effects to add them, with default styles, but you can create your own with programs like After Effects.
Audio
In video editing, we must also take audio into account.
We must check that all our audio clips have the same volume and adjust it if necessary and eliminate excess noise from our tracks through the options.
Before exporting the project, we must also check that our audio is well synchronized with the images.
4. Export the project
To upload your courses to Foxize Cloud, we recommend that you export your videos with at least these characteristics:
- Frame size 1920×1080
- Aspect ratio: 16:9
- frame rate: 25
- When doing the export, it is important to apply a bit rate: 14-16 (Mbps)
You can exceed these characteristics, but keep in mind that the maximum size per uploaded material that we accept is 1,5GB.
With these tips, you will be ready to start editing your online courses. If you don't have your own online training school yet, at Foxize Cloud we offer you a free trial month, without obligation.
